Friday, May 11, 2018

7 Tips To Make Using Your Dab Rig Even More Amazing

Dab rigs, a type of water pipe, are designed specifically to smoke oils or concentrates. Once you get down the basics of using your dab rig, there are certain methods you can incorporate and steps you can take to make your dabbing experience even more amazing.

1. Always Use Gloves

Concentrate oils are slimy. And touching these oils with bare hands can transfer bacteria from your skin to the oil, causing dilution or contamination.

When you’re ready to smoke, wear gloves to keep your oils contaminant-free.

2. Use A Dedicated Dab Rig

While you can use an attachment for your water pipe to smoke concentrate oils, the residue from the dry herbs smoked in your water pipe can taint the clean flavor of your hit.

The best option is to have a dedicated dab rig so you can enjoy the full flavor without having to deal with any potential aftertastes.

3. Turn Down The Heat

If you or someone you know has had a bad dabbing experience, there’s probably a reason. Experienced unpleasant tastes or chest discomfort? We almost guarantee you’re dabbing at too high of a temperature.

Allowing your dab nail to cool following the heating process is a critical step. When the nail is too hot, the concentrates can combust, leading to a very unpleasant inhalation process. High temperatures can even eliminate the compounds that create the smell and flavoring you paid for.

To avoid these issues, always allow your nail or banger to cool after heating it.

4. Use A Carb Cap

A carb cap is a carburetor for your dab rig. It restricts the amount of airflow to your nail, thus allowing you to collect the last of your oil to punctuate the end of your hit. By capping your nail, you’re basically restricting the airflow into the rig. This reduced airflow places your rig under low pressure, lowering the boiling temperature of your oil and giving you a bloom of thicker, better-tasting smoke.

5. Utilize A Quartz Nail Or Banger

In order to get the best taste from your dab rig, try using a quartz banger or nail. These provide an intensely clean and pure taste when used with your favorite concentrates.

Quartz nails and bangers are also much more durable than glass nails. A banger extends from your dab rig, protecting the rig from the heat of the torch and preventing potential cracks.

6. Clean Your Dab Rig Frequently

To get the most potent hits, your dab rig needs to be clean. And the more frequently you clean it, the easier it will be to clean.

When your dab rig is squeaky clean, you’ll be able to taste your oil concentrates even better, without the lingering taste of old concentrates.

7. Upgrade Your Dab Rig

An easy way to make your experience even more amazing is to upgrade to a  dab rig with a percolator. This sub chamber allows the smoke being created to interact with water and lower the temperature. This ensures a cooler, smoother smoke.

Check out this article to learn more about how a percolator can up your dab rig game.

Find Dab Rigs And Oil Rig Accessories At Thick Ass Glass

Looking for the perfect dabbing product? Browse our entire collection of dab rigs and dab rig accessories today.


source https://www.thickassglass.com/blogs/enlightenment/dab-rig-tips

Thick Ass Glassary: Your Ultimate Water Pipe Glossary

Banger, dab nail, drag, joints — you’ve probably noticed that the water pipe industry has a lot of jargon. For the beginner who’s still just trying to figure out what size water pipe they want to buy, it can be pretty overwhelming. That’s where Thick Ass Glass has your back. We’ve created an all-inclusive glossary to help you figure out what all our different water pipes, dab rigs, and accessories are and what they do. If you’re ready to become an expert in glass, read on!


Ash catcher: a piece within the water pipe that catches ash and helps maintain the cleanliness of the pipe. They are especially helpful if percolators are being used.


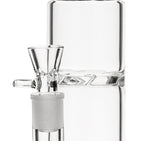
Banger: a type of dab nail with a dish further separated from your dab rig, which ensures that your rig’s joint is less likely to be damaged due to excess heat.


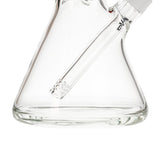
Beaker Base: the wide, beaker-shaped base of a water pipe. More stable than a straight pipe and great for beginners!


Water Pipe Bowl

Bowl: the external part of a water pipe or dab rig used to place and combust your product of choice.


Bubbler: a small, hand-held water pipe.


Carb cap: a cap most commonly attached to the end of a domeless nail. It manipulates air flow to create a lower temperature smoke or vapor.


Chamber: refers to the different internal spaces of a water pipe, such as the water chamber or recycling chambers.


Chillum: a straight pipe with an end-to-end channel and no choke.


Choke (Carb): a small hole that regulates airflow. To close the hole and allow smoke to fill the chamber, simply press your finger to it.  Then remove your finger and continue inhaling to clear all the smoke from the chamber.


Dabber: used to scoop and press your desired oil against the heated surface of your dab rig. They are generally made of stainless steel, glass, or titanium.


Dab e-nail: an electronic nail. They use heating coils and connect to e-nail capable domeless nails, which can be made of quartz, titanium, or even silicon carbide.


Dab nail: like a bowl, the nail is what you heat to put your concentrates on and feeds the resulting smoke/vapor into your dab rig or water pipe.


Dab rig: a type of water pipe made especially for smoking oils.

Dome: a small piece that goes on top of a nail. It helps capture and hold vapor until you are ready to inhale. They are generally made of glass, titanium, or quartz.


Diffuser (Percolator): a filter used to force the hot smoke or vapor through the cool water inside your pipe and, in turn, cool down the smoke or vapor to give you a smoother hit. Some diffusers are simple, with only one hole located at the bottom of a removable downstem or fixed stem. Others are more complex, such as honeycomb discs, which can have hundreds of holes and create high levels of diffusion (lots of bubbles) for extremely smooth smoke.  


Drag: how easy or difficult it is to inhale smoke from a pipe. Some percolators with massive diffusion can cause a large amount of drag.


Dropdown: an accessory that creates space between the glass joint and the nail (or other accessory) you are using for your water pipe or dab rig.  


Water Pipe With Diffused Downstem

Downstem: a long glass tube near the base of a water pipe that extends from the pipe’s joint into its main chamber. Some are diffused, meaning they have small holes at their base used to diffuse the smoke without the use of a separate percolator.


Hammer: refers to the hammer-like shape of a pipe or percolator within a water pipe.


Healthstone: a porous, ceramic material that can be used in place of a standard glass, titanium, or quartz nail or dome. Works well with concentrates.


Hemp wick: a healthier, natural alternative to gas or butane lighters. Many users say that, because of the lack of fumes, using a hemp wick to light concentrates leads to a cleaner, tastier hit.


Herb iron: a ceramic heating element used as an alternative to gas or butane lighters. It’s a safe option that heats up and cools down quickly.


Herb grinder: used to grind herbs into a finer texture, which makes your product last longer and gives you more satisfying hits.


Water Pipe With Honeycomb Disc

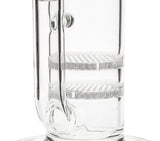
Honeycomb disc: a kind of percolator common in stemless water pipes that aerates the water and allows for a smoother hit.  


Ice Pinch: a pinched section near the base of many stemmed water pipes where ice is held. The purpose of adding ice is to cool the smoke and allow for a smoother hit; this trick is highly recommended for beginners.  

Incycler: a type of recycler that has the water funnel chamber suspended inside of the first chamber, rather than two separate chambers. Some incyclers use small holes within the drain funnel to recycle the water rather than an external tube.  


Joint: the part of the water pipe where a bowl or other accessory connects. Some of the most common joint sizes are 10mm, 14mm, and 19mm. Joints can be either “male” or “female,” with male being better for concentrates and female being preferable for herbs. Be sure to buy the right size for your particular pipe or rig!


Mouthpiece: a removable cap you can attach to the top of a water pipe or oil rig; it helps prevent the spread of germs when sharing with friends.


Oil: legal, commonly essential oils. You would most likely smoke these using a dab rig.  


Percolator (Diffuser): a filtration device inside a water pipe. They force hot smoke or vapor through the cool water inside your pipe using bubbles and, in turn, cool down the smoke or vapor to give you a smoother hit.  


Piece: slang for a water pipe or dab rig.


Reclaim: leftover oils or concentrates captured in a reclaim bucket and ready for reuse.  


Reclaim bucket: an attachment for your water pipe or dab rig that captures and saves your oils or concentrates that otherwise would have been lost.  


Recycler: a type of water pipe that typically uses two chambers to transfer vapor and cool water from the first chamber to the second. This provides a continuous filtration cycle, and preserves the flavor of oils and concentrates.


Slide: typically made of glass, it is the piece used to push your herbs into the bowl as they are lit or vaporized. It also functions as a carb, releasing smoke into the chamber as you remove it.


Splash Guard: a disc-shaped piece found in some water pipes to keep water from bubbling up and splashing your mouth when you take a hit.


Spoon pipes: a handheld glass pipe generally comprised of a mouthpiece, bowl, neck, and carb.


Stemless: a water pipe with an attached glass stem leading to the water chamber rather than a removable downstem.


Torch: usually propane or butane, they are used to vaporize or burn your oils, concentrates, or herbs.


Tube: slang for water pipe.


Thick Ass Glass is the place for all kinds of reliable and durable water pipes and dab rigs. We’ve also got plenty of bangers, carb caps, domeless quartz nails, and much more. Now that you know what all those things mean, browse our products and find the right water pipes and accessories for you!


source https://www.thickassglass.com/blogs/enlightenment/water-pipe-glossary

How To Use A Dab Rig

The concept of using a dab rig or oil rig has been gaining more and more traction as the hobby heats up. But if you’ve never used one before, it can be confusing and even dangerous to use a dab rig without knowing and understanding the right way.

Today, we’ll take you through the basics and break down the process into nine easy-to-follow steps. Let’s get started.

First, A Definition

A dab rig (also known as an oil rig) is very similar in appearance and design to a glass water pipe. However, dab rigs are designed specifically for the consumption of oils.

What You’ll Need

  • Dab rig
  • Dabber (wand)
  • Rag or alcohol swab
  • Dab nail
  • Hand torch
  • Bowl of water
  • Tongs
  • Oil concentrate

Step 1: Water The Chamber

Begin by adding water to the chamber of your dab rig. Try blowing into the downstem to ensure that you’re able to make the water bubble, if water splashes up into your mouth, pour some out.

Step 2: Season Your Nail

You’ll always want to season a quartz or titanium dab nail. Brand-new nails are made of fresh materials that contain trace elements of a multitude of natural minerals (metals). When heated, the dab nail’s pores will leach out these metals. So a nail left unseasoned can emit an unpleasant metal taste into the vapors you’re about to inhale. Seasoning a nail helps to fill the pores with carbon from burnt oils, therefore stopping the leaching.

To season, place the nail in the rig and heat it with your hand torch until you start to see the nail turn red. Then, use your dabber to apply essential oil concentrate over the nail’s head. Once the it fully coats the nail, use tongs to remove the nail and place it into a bowl of water. Repeat this process at least three times before using your new nail for the first time.

Step 3: Prep Your Dab

Take your dabber (also known as a wand) and pick up a small amount of herbal concentrate.. Remember, a little goes a long way with this method of consumption. Set this aside for a minute.

Step 4: Heat The Nail

Take your hand torch and heat up the nail, making sure that the flame is pointed away from the dab rig at all times. Otherwise the heat may crack the glass. Heat until the nail is red hot. Once the nail stops glowing, wait for about 45 seconds.

Step 5: Wait

We wait until the nail is entirely red hot in order to ensure a reliable starting point for our timing. Once the nail is no longer red hot, it signifies that a certain temperature has been reached in which we can consistently count down in order to get the same optimal temperature every time. The exact amount of time you’ll need to wait will vary depending on your preference, oil rig and nail. Feel free to experiment the first time and you’ll hone the wait time the more you practice. You should always wait at least 10 seconds. Some users find that they’ll get better dabs if they wait 20-30 seconds before moving on to the next step.

Step 6: Place Oil On Nail

After your nail has cooled slightly, pick up your wand and place the oil around the nail. You’ll want to slowly rub the end of the wand containing the oil around the interior edges of the nail. While doing this, pull air through the chamber, making the water bubble as the vapors are produced.

Step 7: Inhale Through The Mouthpiece

You will see the vapors filling the glass as the concentrate melts. Inhale the flavorful herb as it comes out of the downstem. Continuously inhale until you no longer see vapor in the chamber of the dab rig.

Step 8: Exhale And Repeat

Once the vapor is clear, lower the rig and exhale. Continue to heat the nail and insert oil as many times as desired.

Step 9: Clean The Wand And Nail

Take the hand torch and heat the end of the wand that touched the wax. It should only take a second of heat in order to melt away the residue. Wipe clean with a rag or alcohol swab while the residue is warm and easy to remove.

There are two popular ways to clean your nail so that it won’t harbor any sticky residue film.

Option 1: Heat your nail with the torch until all residue is eliminated.

Option 2 (Quartz Only): This method is to be used only for low-temperature dabs. Immediately after inhaling, take a Q-Tip and dip it into Isopropyl alcohol. Use it to clean the inside of your banger. Then use the other side of the Q-Tip to wipe the banger dry. This is a very popular method that will ensure the longevity of your quartz nail, maximizing flavor as well.

With time and practice, you’ll get better and truly hone your skills until these steps become almost second nature.

Purchase Affordable Dab Rigs At Thick Ass Glass

Thick Ass Glass is your go-to source for all of your reliable and durable dab rig needs. Also be sure to check out our carb caps, bangers, domeless quartz nails and so much more. Contact us for more information.

source https://www.thickassglass.com/blogs/enlightenment/dab-rig-how-to

Tuesday, May 1, 2018

The Right Way To Clean A Water Pipe

Keeping your water pipe clean is an integral part of prolonging the lifespan of your pipe.

Plus, cleaning your water pipe often will ensure nothing messes with the flavor of your vapor.

If you use your water or glass pipe on a regular basis, it's recommended that you change out the water after every use. Some signs that you might need to give your water pipe a more intensive clean include:

  • A film-like residue on the inside
  • Discolored or smelly water
  • Resin build up
  • Specks starting to appear on the walls of the pipe

Learn how to clean a water pipe and what tools you'll need to keep your water pipe like new.

Tools for Cleaning a Water Pipe

To clean your water pipe, there are several basic tools you'll need. Most of these you might already have around the house. These items include:

  • Pipe cleaner
  • Q-Tips
  • Rubbing alcohol
  • Salt
  • Water
  • The water pipe you wish to clean

How to Clean a Water Pipe - Step by Step

Now that you have the tools needed you are ready to start cleaning your water pipe. Follow these steps to keep your water pipes clean.

Step 1

Begin the cleaning process by pouring salt onto the stem and the bowl of your water pipe. Make sure to not pour so much salt that rubbing alcohol will be blocked from passing through.

Step 2

Now that the water pipe has the salt added, pour in the rubbing alcohol. Plug the mouthpiece and joint of the water pipe  then lightly shake to combine the two.

Step 3

Rinse out the salt and rubbing alcohol mixture with warm water. Use the pipe cleaners or Q-tips on the harder to reach areas of the water pipe if residue or build up is still present.

If there is still significant build up after this step, consider soaking your water pipe in a rubbing alcohol bath overnight. Soaking your water pipe overnight will help clean the harder to reach areas like the bowl and slides.

Step 4

Rinse with water again, and then you are done with the cleaning process. And most importantly, you are ready to use your water pipe!

Keeping Your Water Pipe Clean In Between

Your water pipe is now shiny and like new! If you use your water pipe regularly, it's recommended to use this cleaning method once a week. Also rinse your pipe with hot water after each use to make sure it stays relatively clean in between cleanings with the rubbing alcohol and salt method.

By taking good care of your water pipes and using this cleaning method, you can keep your pipe in top shape, no matter how much you use it.


source https://www.thickassglass.com/blogs/enlightenment/water-pipe-cleaning

The Ultimate Guide To Dab Nails

Dabbing has gained incredible popularity recently, and with this newfound popularity comes a lot of options for dabbing.

There are many different kinds of dab nails available for new or experienced dabbers to use with their dab rigs.

Learn the major differences in dab nails, the pros and cons of these differences, and which one is best for you.

Domed vs.Domeless Dab Nails

One of the most noticeable differences, even if you are new to dabbing, is whether a dab nail is domeless or domed.

Domed Dab Nails

Some of the benefits of using a domed nail along with your oil rig include:

  • Great for individual use because no vapor is wasted.
  • Cheaper than their domeless counterparts.
  • The domed sides trap vapors, so vapor is more potent.
  • The attached dome creates a safer way to dab.

One of the major cons of the domed nails is the amount of time it takes for the dab nail to heat up. The longer the dab nail takes to heat up, the longer the dabbing process could be delayed.

Domeless Dab Nails

Meanwhile, domeless dab nails have no sides to them. With this design comes a specific set of benefits:

  • Allows for bigger dabs.
  • Faster heating compared to domed dab nails.
  • Reduces the risk of burning the oil.

There are cons for this dabbing system too. The main one being that this dab nail design is more intended for experienced dabbers, due to the quick heating abilities. Plus, you lose more vapor unless you use a separate carb cap.

If you are new to dabbing, you may want to consider starting with a domed nail for your dab rig and then working your way up to a domeless design.

E-nails vs. Standard Dab Nails

The major difference between e-nails and standard dab nails is that e-nails don't rely on a butane torch to heat up the nail.

Short for “electronic nails,” e-nails typically feature a controller box that delivers heat to the nail through a coil. The controller box lets you easily — you guessed it — control the temperature. So it eliminates guesswork.

E-nails require heating coils to connect to e-nail capable domeless nails, which can be made from quartz, titanium, and even silicon carbide.

E-nails are an excellent way for ensuring the concentrate reaches a consistent temperature. While these dabbing accessories are considerably more expensive than standard dab nails, if you plan on dabbing regularly, then this might be a good investment for you.

Because e-nails can remain at the ideal temperature for hours, they’re an excellent choice for enjoying multiple dabs in a row, and prevent you from burning oil on the nail.

When using an e-nail, you'll need to make sure you monitor it closely because of the high-temperature used to operate.

If you are an experienced dabber who is looking for a way to do multiple dabs and know how to work an oil rig, an e-nail would be a significant step up for you and your dabbing routine.

Titanium vs. Glass vs. Quartz vs. Ceramic Dab Nails

Besides the differences in the design of the dab nail and how to heat the nail, these dabbing accessories are made from a lot of different materials.

Titanium Dab Nails

This option for dab nails has been around since the beginning of the dabbing craze. It's easy to see why this material is a popular option for a dab rig because of its unmatched durability.

Besides being durable, titanium will also heat up quickly and consistently, which are two crucial components to dabbing.

The most significant negatives to using a titanium nail are that if you choose a lower-grade titanium, you run the risk of titanium oxide building up on the dab nail, which might be harmful for both you and your dab nail.

Plus, the titanium may interfere with the flavor.

If you are a person who doesn't want anything interfering with the flavor, a titanium nail may not be for you.

Glass Dab Nails

Glass dab nails are another popular option among the dabbing community. These dab nails are great for not interfering with the flavor. Plus, they are one of the easiest types of dab nails to clean.

However, glass dab nails are not best for withstanding high levels of heat and may break easily. Unless you are extremely careful with your dab nail, you might have a short lifespan for your glass dab nail.

Quartz Dab Nails

If you liked the sound of the benefits of the glass dab nail but didn't want to risk the easy breakage, a quartz nail might be the perfect one for you.

The quartz mineral offers the same benefits of the glass nails, but the mineral is heavy-duty and offers more durability.

Some of these quartz nails hang off the side of the nail, which is often referred to as a dab banger.

One significant negative of quartz nails is that they will cool off fast. If you are using this material for your dab nail, you'll have to be quick so the dab nail won't cool off too much.

Ceramic Dab Nails

Last but not least is the ceramic dab nail, this material is similar to the glass dab nail. Just like the glass one, ceramic dab nails are easy to clean. This option is also considerably fragile.

High-quality ceramic dab nails are not likely to break from high-heat, but be careful not to drop them.

The Best Dab Nail

There are many different types of dab nails available on the market today, each with their own set of pros and cons.

To recap, here are the factors you'll want to consider:

  • Whether a domed or domeless design better suits your dabbing preferences.
  • If an e-nail is worth the initial investment.
  • What dab nail material is best suited for your dabbing routine. Choose between standard materials like glass, quartz, ceramic, and titanium.

Shop our full selection of dab nails and find the right one for you!


source https://www.thickassglass.com/blogs/enlightenment/dab-nails-guide